# Installation
> How to install Kilo Code on your system
- 网址:https://funcoding.ai/agents/kilo-code/getting-started/installing/
- 来源:Kilo Code 官方文档原文(英文),MIT 许可,同步于 2026-10-11
- 官方原文:https://kilo.ai/docs/getting-started/installing
---
Get started with Kilo Code by installing it on your preferred platform. Choose your development environment below:
## Choose Your Platform
**VS Code**
## VS Code Extension
The current Kilo Code extension is built on the [Kilo CLI](https://github.com/Kilo-Org/kilocode) and is distributed as the **pre-release version** on the VS Code Marketplace.
1. Open VS Code
2. Go to Extensions (`Ctrl+Shift+X` / `Cmd+Shift+X`)
3. Search for "Kilo Code"
4. Click the dropdown arrow next to **Install** and select **Install Pre-Release Version**
The "pre-release" label is a VS Code Marketplace distribution channel — the extension is stable and recommended for all users.
## Manual Installations
### Open VSX Registry
[Open VSX Registry](https://open-vsx.org/) is an open-source alternative to the VS Code Marketplace for VS Code-compatible editors that cannot access the official marketplace due to licensing restrictions.
For VS Code-compatible editors like VSCodium, Gitpod, Eclipse Theia, and Windsurf, you can browse and install directly from the [Kilo Code page on Open VSX Registry](https://open-vsx.org/extension/kilocode/Kilo-Code).
1. Open your editor
2. Access the Extensions view (Side Bar icon or `Ctrl+Shift+X` / `Cmd+Shift+X`)
3. Your editor should be pre-configured to use Open VSX Registry
4. Search for "Kilo Code"
5. Select "Kilo Code" and click **Install**
6. Reload the editor if prompted
If your editor isn't automatically configured for Open VSX Registry, you may need to set it as your extension marketplace in settings. Consult your specific editor's documentation for instructions.
### Via VSIX
If you prefer to download and install the VSIX file directly:
1. **Download the VSIX file:**
- Find official releases on the [Kilo Code GitHub Releases page](https://github.com/Kilo-Org/kilocode/releases)
- Download the `.vsix` file from the [latest release](https://github.com/Kilo-Org/kilocode/releases/latest)
2. **Install in VS Code:**
- Open VS Code
- Access Extensions view
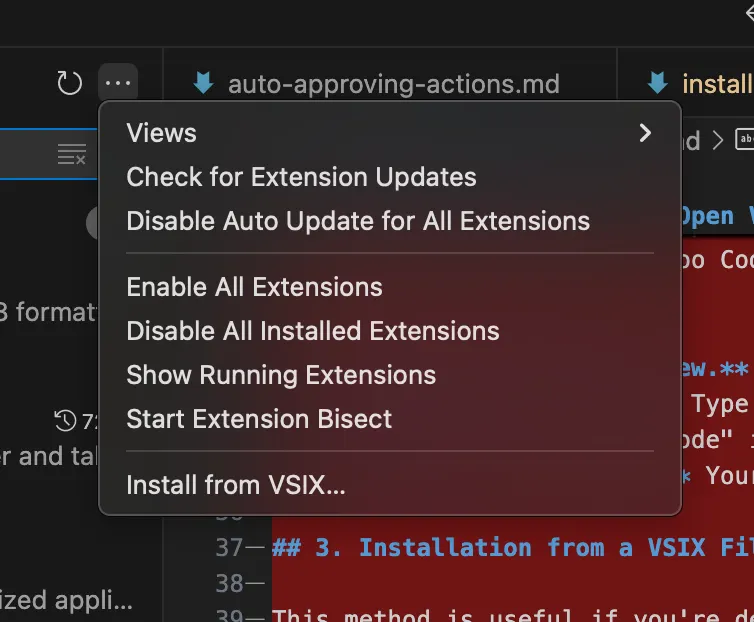
- Click the "..." menu in the Extensions view
- Select "Install from VSIX..."
- Browse to and select your downloaded `.vsix` file
If you need to temporarily go back to an earlier version, use the same flow with a `.vsix` asset from an older release:
1. Open the [Kilo Code GitHub Releases page](https://github.com/Kilo-Org/kilocode/releases)
2. Pick the release you want to stay on and download its VS Code `.vsix` asset
3. In VS Code, open Extensions, click the "..." menu, and select "Install from VSIX..."
4. Choose the downloaded `.vsix` file to install that version
If you plan to remain on that version for a while, you may also want to temporarily disable extension auto-update in VS Code so it does not immediately update again.
## Troubleshooting
**Extension Not Visible**
- Restart VS Code
- Verify Kilo Code is listed and enabled in Extensions
- Try disabling and re-enabling the extension in Extensions
- Check Output panel for errors (View → Output, select "Kilo Code")
**Installation Problems**
- Ensure stable internet connection
- Verify VS Code version 1.84.0 or later
- If VS Code Marketplace is inaccessible, try the Open VSX Registry method
**Windows Users**
- Ensure that **`PowerShell` is added to your `PATH`**:
1. Open **Edit system environment variables** → **Environment Variables**
2. Under **System variables**, select **Path** → **Edit** → **New**
3. Add: `C:\Windows\System32\WindowsPowerShell\v1.0\`
4. Click **OK** and restart VS Code
**CLI**
## Command Line Interface
**JetBrains**
## JetBrains IDEs
**Slack**
## Slack Integration
**Other IDEs**
## Next Steps
After installation:
1. **[Set up authentication](https://funcoding.ai/agents/kilo-code/getting-started/setup-authentication/)** to configure your AI provider
2. **[Run your first task](https://funcoding.ai/agents/kilo-code/getting-started/quickstart/)** — Learn how to chat with Kilo to complete tasks
## Getting Support
If you encounter issues not covered here:
- Join our [Discord community](https://kilo.ai/discord) for real-time support
- Submit issues on [GitHub](https://github.com/Kilo-Org/kilocode/issues)
- Visit our [Reddit community](https://www.reddit.com/r/KiloCode)